Table of Contents
Changelog
| Version | Date | Author | Comment |
|---|---|---|---|
| V0.1 | 19.03.2022 | Florian Kellermann | created |
| V0.2 | 28.04.2022 | Florian Kellermann | updated |
| V0.3 | 29.04.2022 | Florian Kellermann | updated |
| V0.4 | 29.04.2022 | Florian Kellermann | updated |
| V0.5 | 06.05.2022 | Florian Kellermann | finished |
Note
Since most of the functionality has not been changed in comparison to the old version the user manual has similarities of some sorts. The main changes, as described in the SAS, SRS and CRS happened in the program now being a standalone application.
1. Introduction
1.1 Overview
As said before the main task was to convert the plugin into a standalone application. Changes have also been made to improve the general usability of the program as described in this User Manual.
The purpose of the user manual is to explain how to use the Modeling Wizard program. It writes that even novice users can understand how to use the standalone app. It includes instructions for installing the program, using the general interface, and importing and exporting files.
1.2 Glossar
AML Automation mark-up language is an open standard data format for storing and exchanging plant planning data.
AML Editor Abbreviation for the AutomationML-Editor
AMLX AML Package
CAEX Computer-Aided Engineering Exchange
C# High level language often used for programming
GSD General-Station-Description
GUI Graphical User Interface
IODD Input/Output Device Description
.NET The .NET Framework is a software development and runtime environment developed by Microsoft for Microsoft Windows.
ZIP archive file format
2. Installation
2.1 Software Requirements
To use our Modelling Wizard program, you need:
- A operating system capable of running .exe files.
- The files downloaded with the release in the same folder as the Application.exe
2.2 Installation process
Download the latest version of the Modelling Wizard (You can find the latest version in our release history Here)
In the newest release you can download the .zip file under Assets -> Binary.zip

The .zip folder after download must contain the following files:
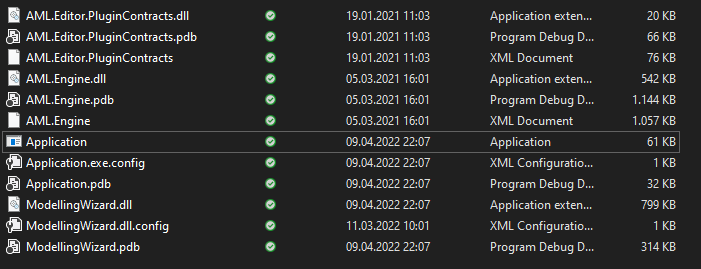
Continue by starting the Application.exe. There is no further action required. You no longer need to accept any terms of agreement since the AML Editor is no longer in use.
If everything worked out successfully you should now be looking at the programs graphical user interface:
If this is not the case try downloading the files again or try an older release to see where the problem might be originating from.
3. Graphical User Interface
3.1 General Information
The purpose of this chapter is to explain the user interface for Modelling Wizard. There are three tabs in the program that contain information. The functions of each tab and their options will be explained in its own subsection.

The "Generic Data" tab contains general information about the device that will be created.
You can add interfaces to the "Interfaces" tab to define detailed information about a device.
The "Attachments" tab allows you to add more attachments to the file.
Within the Modeling Wizard plugin, you have the option of adding the "Vendor Name" and the "Device Name" in the header bar. These fields are automatically filled if you import a file. The header bar's fields are synchronized with the "Manufacturer" and "Model" fields in the Attributes table under the Generic Data tab, so if you fill the fields in the header bar, they will also be filled in the Attributes table.

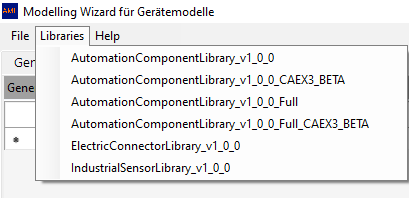
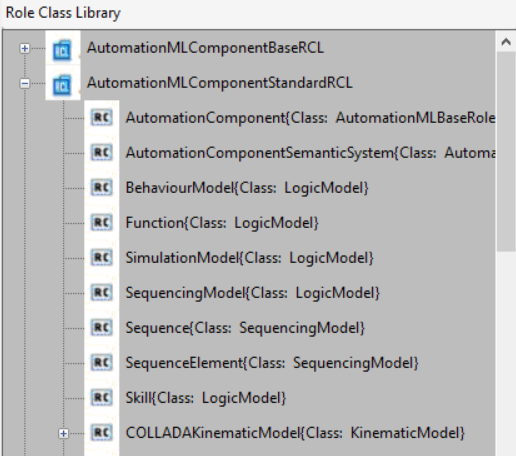
Select the "Libraries" dropdown button in the header bar. A list of libraries that can be loaded into the program will appear. Select an existing library from the dropdown menu and make it available in the "Role Class Library" section of your device if you need more information about it.
3.1.1 Generic Data Tab
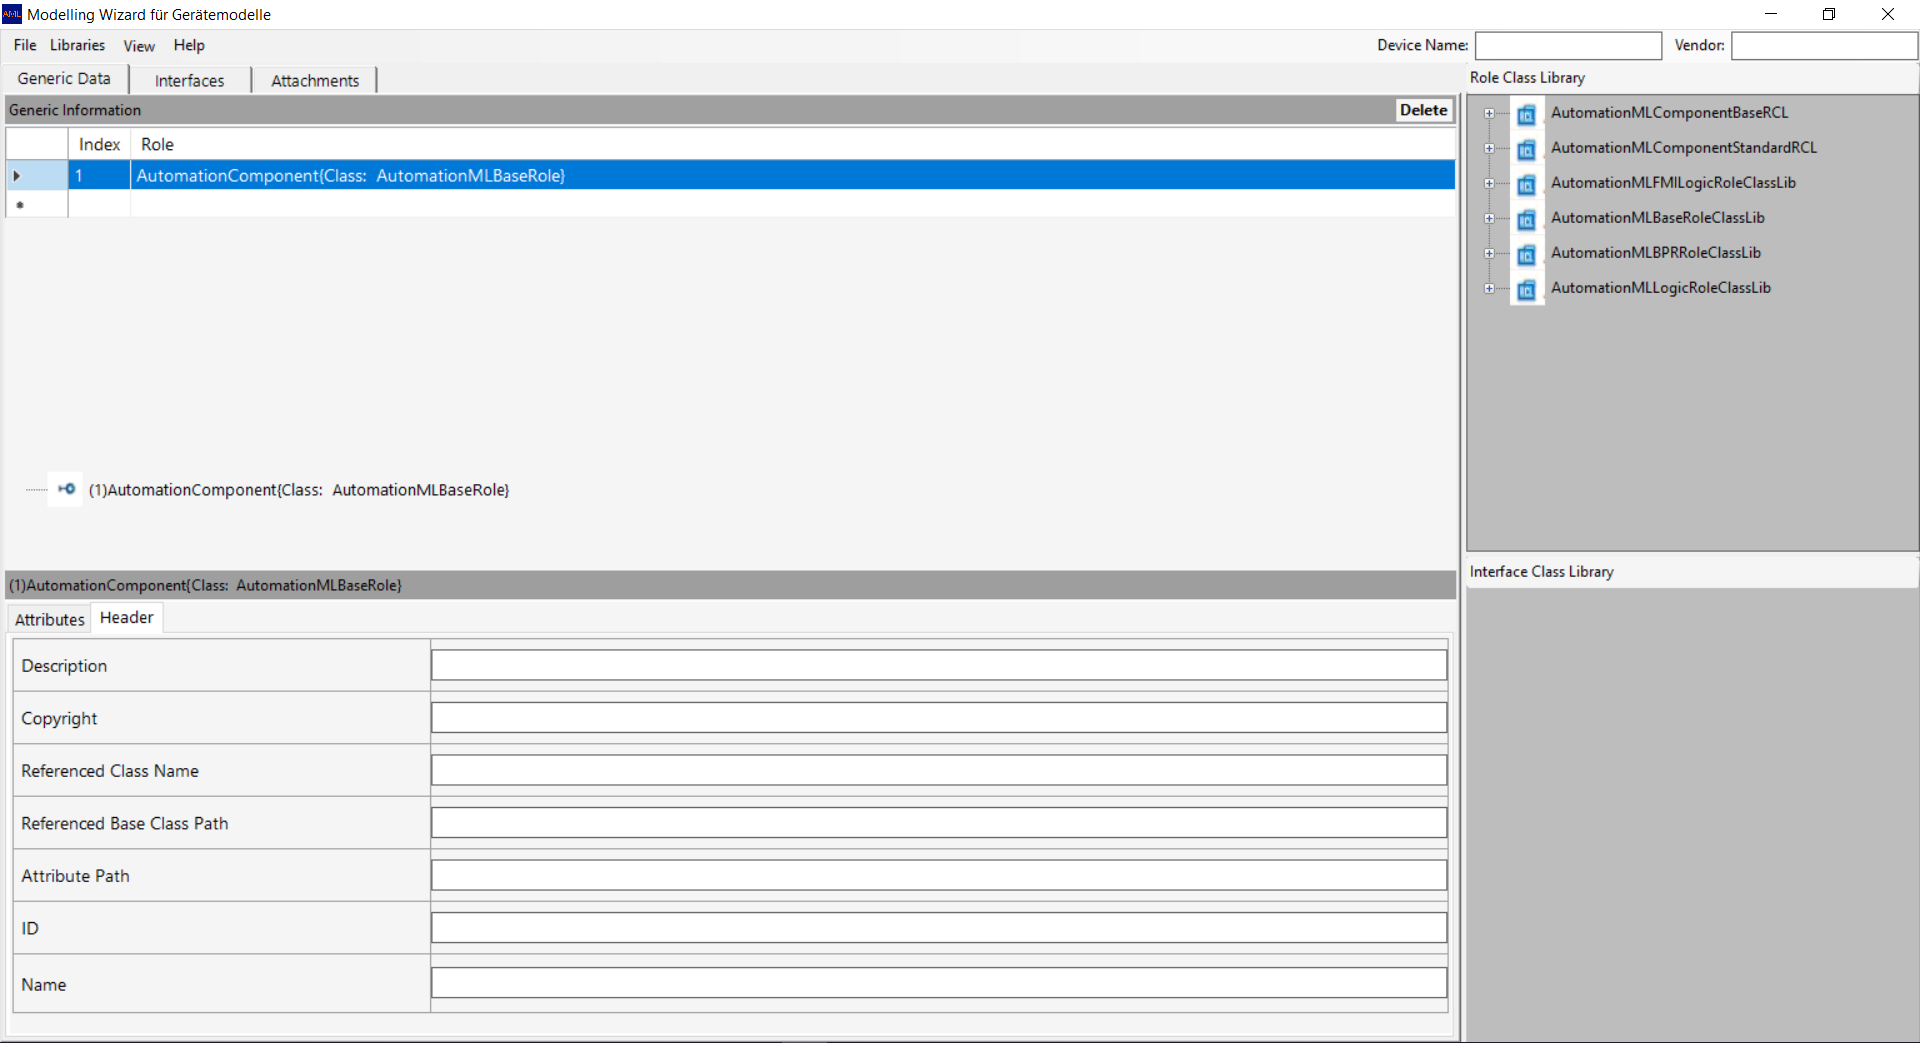
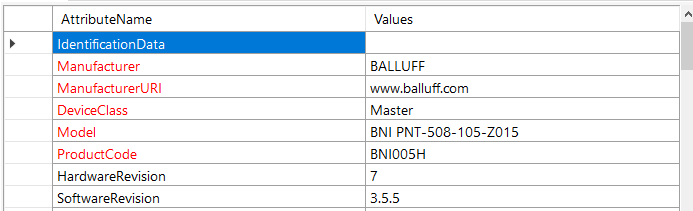
The Attributes table can be filled with general information about the device. The red marked fields must be filled in with information. Some dummy attributes are added to the device to show how it works:

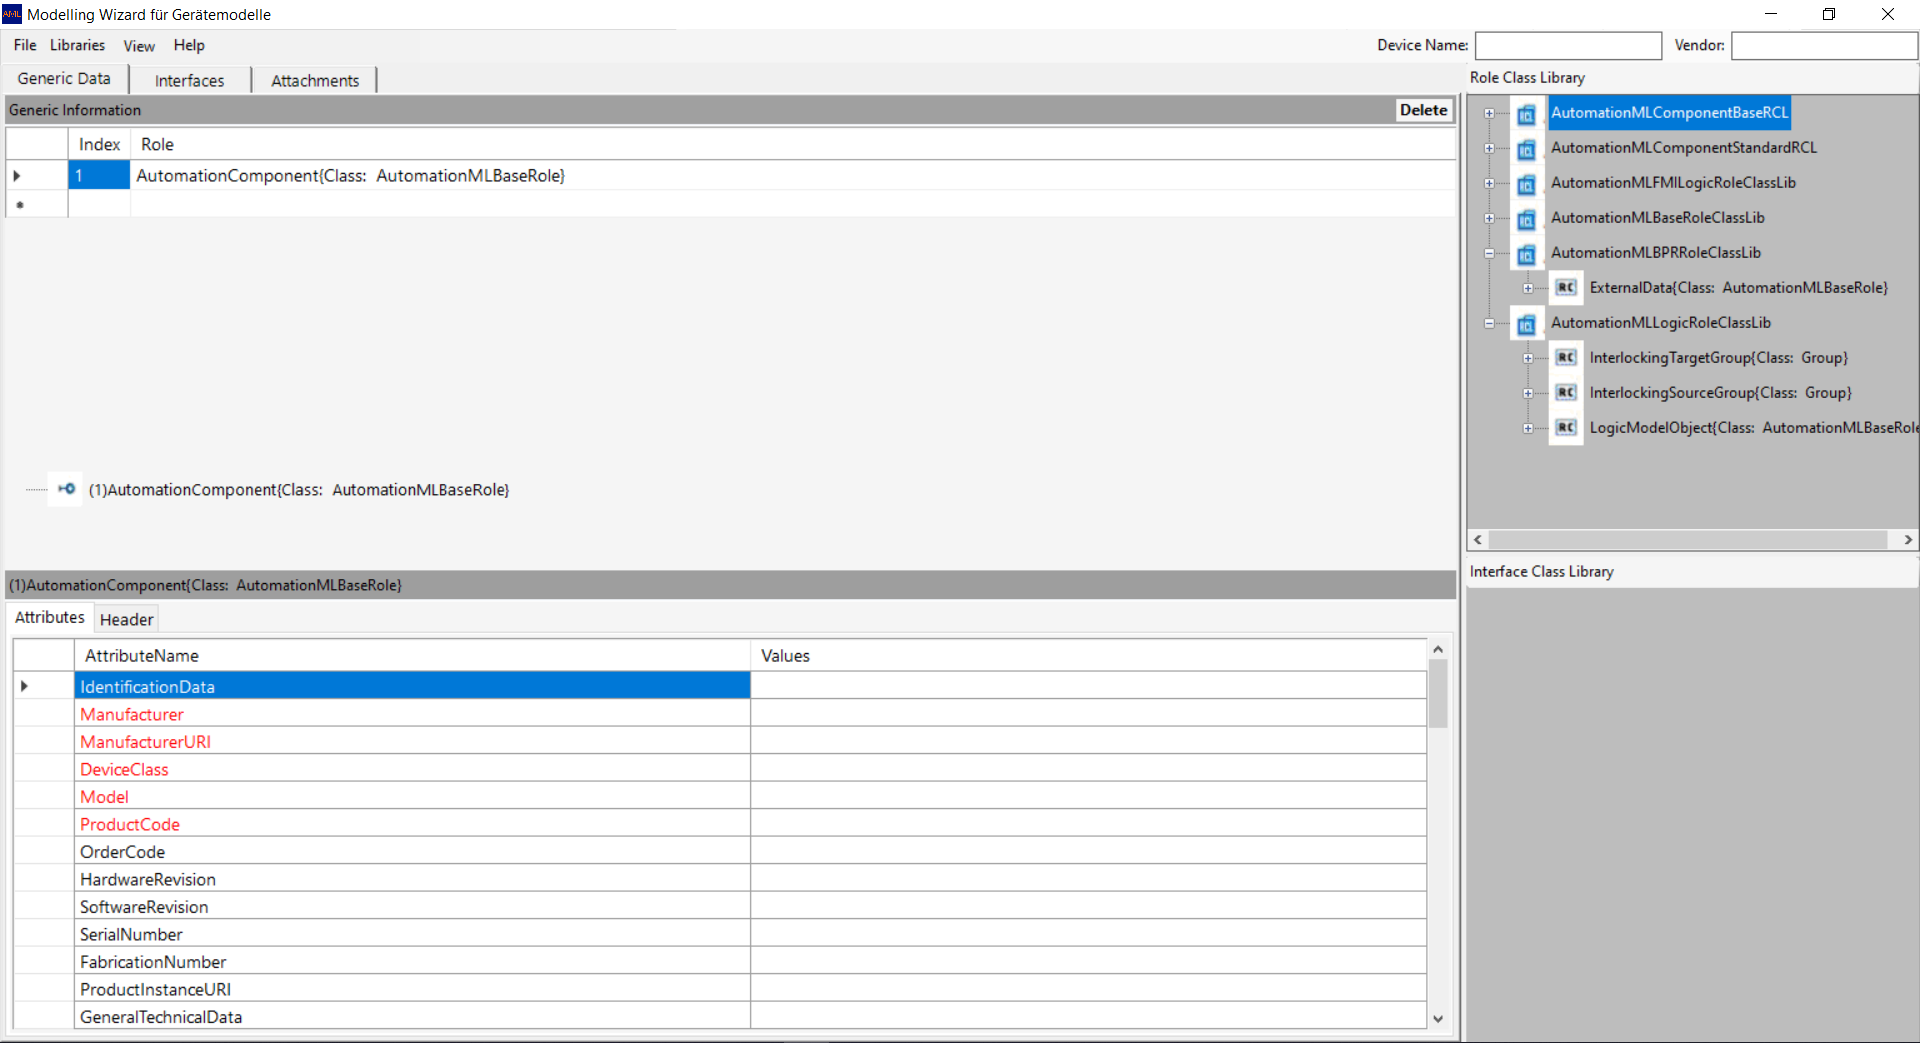
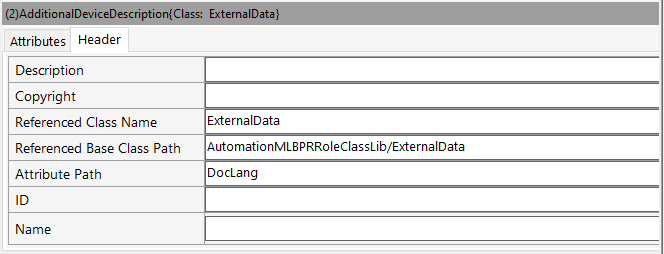
A Role class library can also be added to the general information. The Role Class Library only appears if you have selected the Generic Data tab. To add a role class library, select the desired role class and drag&drop it into the "Generic Information" table. The Generic Information table is located in the upper half of the General Data tab. In this case, the AdditionalDeviceDescription class is added to the device.
Generic Information table

The new attribute (Here marked in blue) will be added to the Generic Fnformation table.
To view the properties of the role class you just added to the device via drag and drop, select the role class in the general information table, then double-click the new item marked above the property table will appear. After properties are saved, they appear in this Properties table.
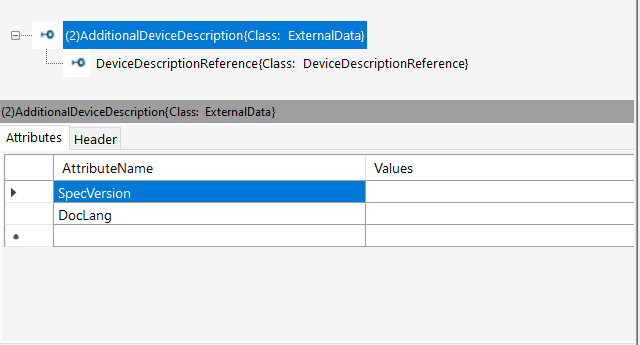
The Header tab of the Attributes table carries records about the Role Class that is introduced to the device. Through including a Role Class, the header tab will be packed with records that is stored in the certain Role Class. However you could upload more information aswell.
To delete a Role Class from your device, select the Role Class in the Generic Information table and press on the "Delete Button" that is placed on the top right side of the table. The Role Class will be deleted from the table and also from the file.
3.1.2 Interfaces tab
The utilization of the Interfaces tab firmly compares to the utilization of the Generic Data tab. Here you can add Interfaces Class Libraries to the device. The Interface Class Libraries will be shown assuming you are under the Interfaces tab.
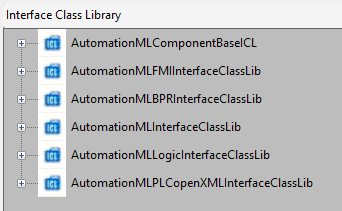
To add an Interface Class Library, adhere to the directions under 3.1.1 Generic Data tab, they work the same way.
3.1.3 Attachments tab
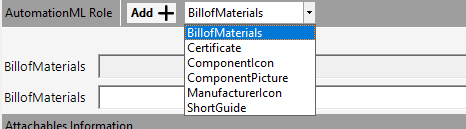
The Attachments tab offers the chance, to add attachments like pictures or PDFs to your device file. To do as such, select the sort of the attachment you need to add that will be shown assuming you click on the dropdown button. The accompanying attachment types are incorporated:
In the wake of choosing the kind of the attachment you need to add, you can choose a document from your PC with the "Select File" Button. To choose the document by giving it a specific path, for example if the file is stored elsewhere, you can add a path in the "Add path" field. Here a file of the "Certificate" type will be joined.

After the document is connected, the type and the file path will be shown in the table like you can see above. To erase a attachment, click on the "Delete" Button on the right half of the header bar of the table.
3.2 File Import
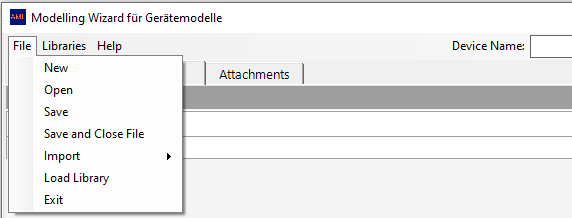
Like previously referenced, the Modeling Wizard program offers the capacity to import a file and show its properties. Kindly note that you are simply ready to open files that are saved in the AML (.aml; .amlx; .xml;) document type. To open an AML document, start the Modelling Wizard and select in the header bar "File" - > "Open".
After this, a windows explorer opens where you can choose a file that will be show in the Modelling Wizard. To show the file, select it and snap on "Open".

After the import of the file, the vendor name (for this situation Balluff) and the device name will be shown in the header bar of the program.

Different attributes are shown in the "Attributes table" (for example the URL of the maker) under the "Generic Data" tab.
Moreover, the interfaces and the attachments of the device that is made with the AML document should be visible in their "Interfaces" and "Attachments" tab.
Error Handling
Meanwhile it is possible to import most of the AML files, nevertheless there are a few libraries that the Modelling Wizard program is not able to work with. If you try to import a file that contains such a library, the Modeling Wizard will put out a error message to inform you.
3.3 File Export
In this part it will be told the best way to save a document that is made with the Modeling Wizard program. The example file of 3.2 File Import will be utilized to exhibit how it functions. To make a new file, select "New" in the File dropdown button of the header bar.
Important Information: As already mentioned in 3.1.1 Generic Data Tab following fields are mandatory fields and must be filled with information, otherwise you are not able to save a file:

Those fields are recorded in the "Attributes" table under the "Generic Data" tab. In the event that they are not filled when you attempt to safe the file, you will get an error message.
If you have any desire to save the file, go to the "Document" button in the header bar. You will get 2 choices:
1 - Save
2 - Save and Close File
Option 1 - Save: Select a target location and save the file and all of the information you filled in. After the save, you will be able to continue the altering of the file and add more data. Valuable to make temporary savings while making a new document
Option 2 - Save and Close File: Select a target location and save the file. After saving, all information that is currently displayed in the Modelling Wizard plugin will be deleted from the fields. This option is useful when you have finished editing a file and want to create a new one.
Please note that all files that will be saved are automatically stored in the .amlx file type. For this reason you are not able to select a file type by yourself while saving a file.
3.4 Change edit mode
In order to improve the usability and user friendlines the application was split into two seperate modes. The "easy" mode and the "advanced" mode. To switch between the modes the "option" button in the toolbar menue can be selected. There you see the option "Advanced mode" if you are in easy mode and "Easy mode" if you are in advanced mode.

When you are in the advanced mode the attributes tab contains more information than in easy mode.

3.5 Change CAEX version
To switch the current CAEX version you can select it in the "Options" which you can find in the toolbar menu.
The different versions are CAEX 3.0 and 2.15. If you are currently in CAEX 3.0 then you have the possibilty to switch to 2.15 displayed in "Options" and vice versa.
4. Copyright
About the Modelling Wizard for Devices PlugIn/Program
The Modelling Wizard for Devices is a program that can be used to create or modify devices and interfaces. It can also be used to import IODD and GSDML, CAEX 2.15 and CAEX 3.0 files that will be converted to the AMLX (.aml; .amlx; .xml;) package.
Version 3.0.0.0
Design and Software development by
TINF17C DHBW Stuttgart
and
Master Student Raj Kumar Pulaparthi, Otto-von-Guericke University Magdeburg
and
TINF19C DHBW Stuttgart
and
TINF20C DHBW Stuttgart
This plugin was created as a group project in the "Software Engineering" class.
TERMS AND CONDITIONS FOR COPYING, DISTRIBUTION AND MODIFICATION
The General Public License (GNU)
Copyright © 2022 TINF20C DHBW Stuttgart
This program is free software: you can redistribute it and/or modify it under the terms of the GNU General Public License as published by the Free Software Foundation, either version 3 of the License, or (at your option) any later version.
This program is distributed in the hope that it will be useful, but WITHOUT ANY WARRANTY; without even the implied warranty of MERCHANTABILITY or FITNESS FOR A PARTICULAR PURPOSE. See the GNU General Public License for more details.
You should have received a copy of the GNU General Public License along with this program. If not, see https://www.gnu.org/licenses/.
© TINF20C DHBW Stuttgart 2022
This program uses third-party software for the convertions of IODD and GSDML. All rights are reserved by the corresponding copyright owner.
Author: Florian Kellermann